X-Lite
Setup instructions for X-Lite Softphone App for Windows and Mac
X-Lite
Windows
Follow the guide below to get up and running with the X-Lite application:
- Download, install and launch X-Lite.
- Go to the Account Settings Link.
- Click on
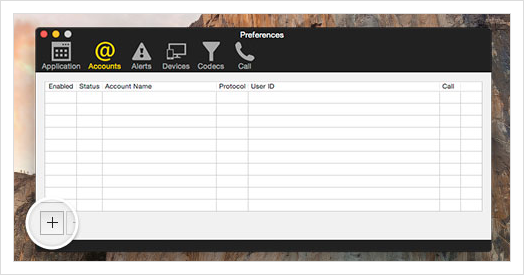
Accountsand then click+to add a new account (if the new account window doesn't automatically appear).

Add a new account
- In the
Account namefield, enter a description for your VoIP User. Make sure thatUse for:'CallandIM/Presence` are both checked.

Add a description for your VoIP User
- In the User ID field, enter the username you set up on the VoIP User (this is case sensitive).

Add Username for your VoIP User
- In the Domain field, enter the domain supplied with your VoIP User.

Add domain for your VoIP User
- In the Password field, enter the password you set up on the VoIP User (this is case sensitive).

Add password for your VoIP User
- Make sure
Register with domain and receive callsis checked.

Register with domain and receive calls
-
In the Send outbound via: section, make sure the
Domainoption is selected. -
Click
OKto save your settings.
MacOS
Follow the guide below to get up and running with the X-Lite application:
- Download, install and launch X-Lite.
- Click X-Lite in the task bar and then select Preferences.
- Click
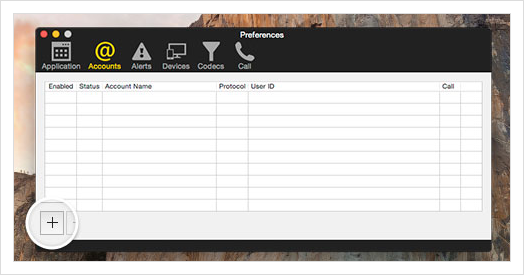
Accountsand then click+to add a new account (if the new account window doesn't automatically appear).

Add a new account
- In the
Account namefield, enter a description for your VoIP User. Make sure that 'Use for:'CallandIM/Presenceare both checked.

Add a description for your VoIP User
- In the User ID field, enter the username you set up on the VoIP User (this is case sensitive).

Add Username for your VoIP User
- In the Domain field, enter the domain supplied with your VoIP user.

Add domain for your VoIP User
- In the Password field, enter the password you set up on the VoIP User (this is case sensitive).

Add password for your VoIP User
- Make sure
Register with domain and receive callsis checked.

Register with domain and receive calls is checked
-
In the 'Send outbound via:' section, make sure the
Domainoption is selected. -
Click
OKto save your settings.
Updated about 1 year ago
