Bria
Setup instructions for Bria Softphone App for Windows and Mac
Bria
Windows
Follow the guide below to get up and running with the Bria application:
- Purchase, download, install and launch Bria.
- Go to the Account Settings Link.
- Click
Accountsand then click+to add a new account (if the new account window doesn't automatically appear).
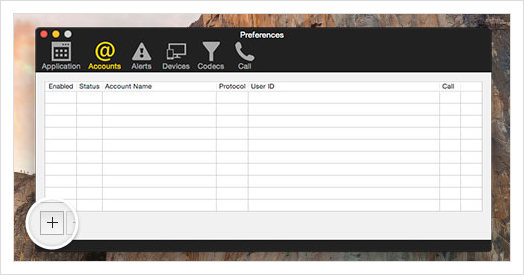
Add a new account
- In the 'Account name' field, enter a description for your VoIP User. Make sure that 'Use for:'
CallandIM/Presenceare both checked.

Add a description for your VoIP User
- In the User ID field, enter the username you set up on the VoIP User (this is case sensitive).

Add Username for your VoIP User
- In the Domain field, enter the domain supplied with your VoIP User.

Add domain for your VoIP User
- In the Password field, enter the password you set up on the VoIP User (this is case sensitive).

Add password for your VoIP User
- Make sure
Register with domain and receive callsis checked.

Register with domain and receive calls
-
In the Send outbound via: section, make sure the
Domainoption is selected. -
Click
OKto save your settings.
MacOS
Follow the guide below to get up and running with the Bria application:
- Purchase, download, install and launch Bria.
- Click Bria in the task bar and then select Preferences.
- Click
Accountsand then click+to add a new account (if the new account window doesn't automatically appear).
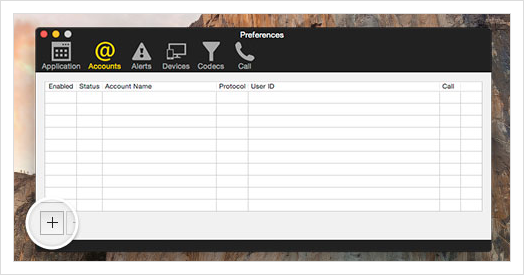
Add a new account
- In the
Account namefield, enter a description for your VoIP User. Make sure that 'Use for:'CallandIM/Presenceare both checked.

Add a description for your VoIP User
- In the User ID field, enter the username you set up on the VoIP User (this is case sensitive).

Add Username for your VoIP User
- In the Domain field, enter the domain supplied with your VoIP User.

Add domain for your VoIP User
- In the Password field, enter the password you set up on the VoIP User (this is case sensitive).

Add password for your VoIP User
- Make sure
Register with domain and receive callsis checked.

Register with domain and receive calls
-
In the Send outbound via: section, make sure the
Domainoption is selected. -
Click OK to save your settings.
iOS
Follow the guide below to get up and running with the Bria application:
-
Purchase, download, install and launch Bria.
-
Click
Settingsand then clickAccounts
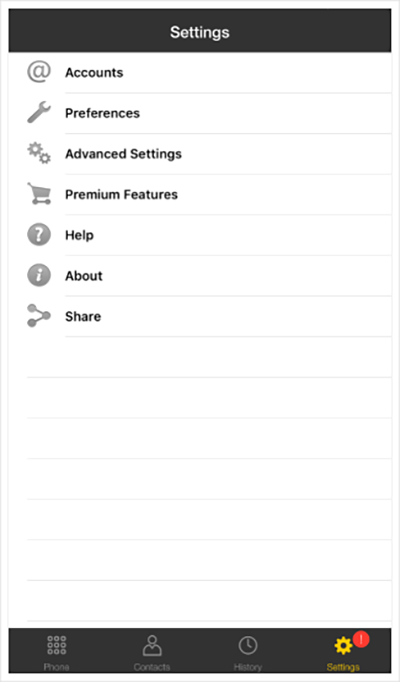
Click the Settings tab and then select Accounts
- Click
+
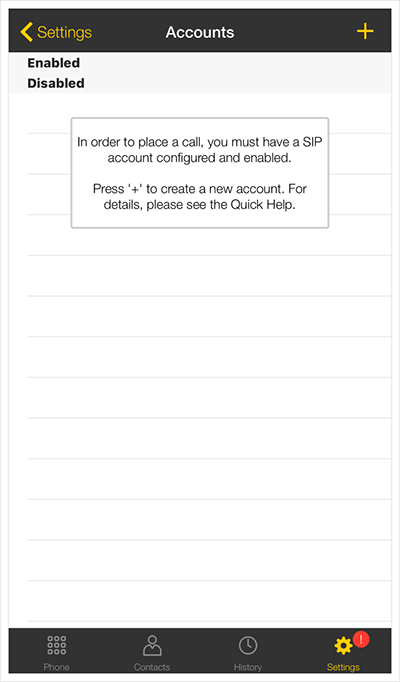
Tap the + button
- Select
TTNCfrom theVoIP Providers - Callinglist.
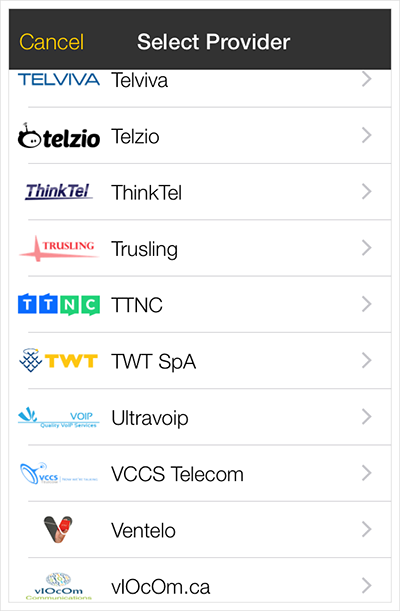
Select TTNC
- Use the credentials of your VoIP User to fill out the
Username,Password,Domain(these are all case sensitive) andDisplay asthen tapRegister
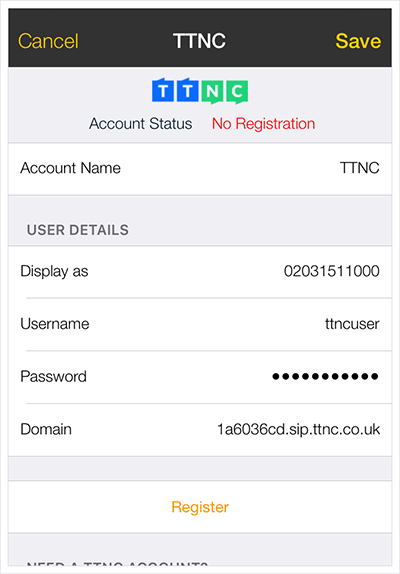
Fill in your VoIP User credentials
Android
Follow the guide below to get up and running with the Bria application:
-
Purchase, download, install and launch Bria.
-
Click
Settingsand then clickAccounts
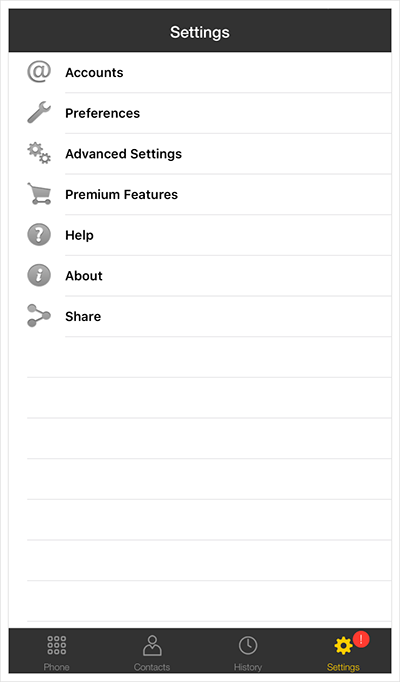
Click the Settings tab and then select Accounts
- Click
+
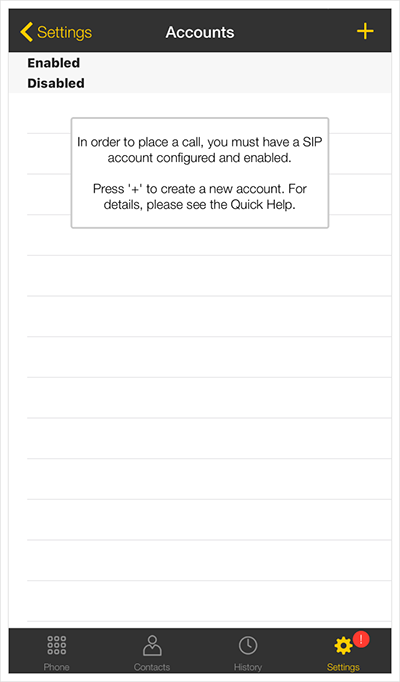
Tap the + button
- Select
TTNCfrom theVoIP Providers - Callinglist.
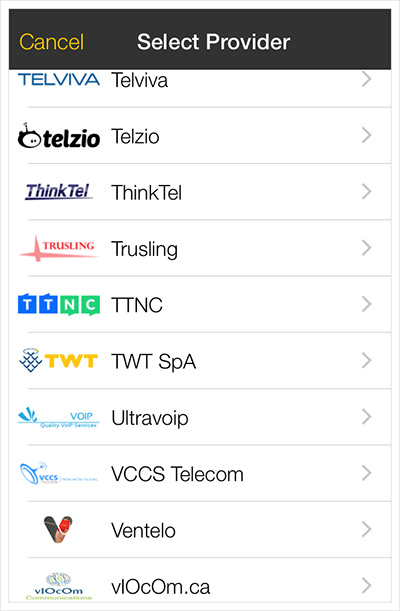
Select TTNC
- Use the credentials of your VoIP User to fill out the
Username,Password,Domain(these are all case sensitive) andDisplay asthen tapRegister
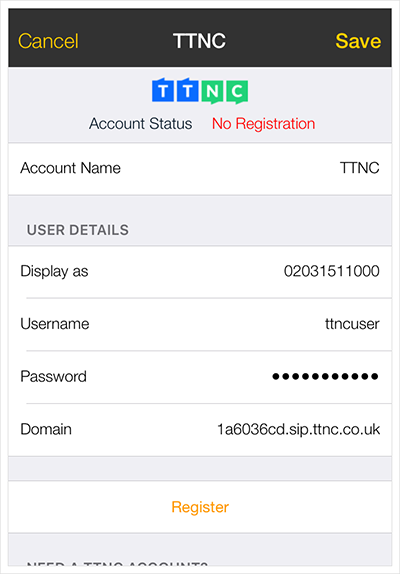
Fill in your VoIP User credentials
Updated about 1 year ago
