VoIP User
Instead of forwarding calls from your TTNC number to a traditional landline or mobile, you can answer the call over the internet with the VoIP User Bolt On. The VoIP User can be registered onto a physical handset or the TTNC Softphone App for Mobile and Desktop.
Adding VoIP Users
Each person looking to make and receive calls will require their own VoIP User. You can add VoIP Users through the store in myTTNC. Just follow these simple steps:
-
Log into myTTNC by going to www.myttnc.co.uk
-
Click on
Storein the left-hand menu.
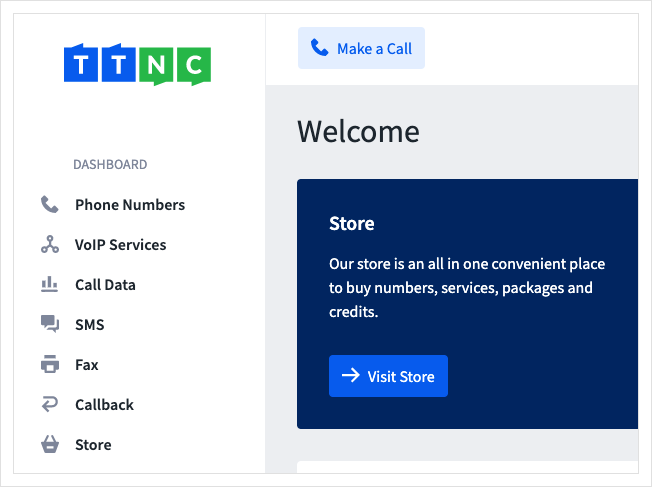
Click on 'myTTNC store
- Click on the
Services

Click on 'Add Bolt On Services
- Click
Buy Nowon the VoIP User option.
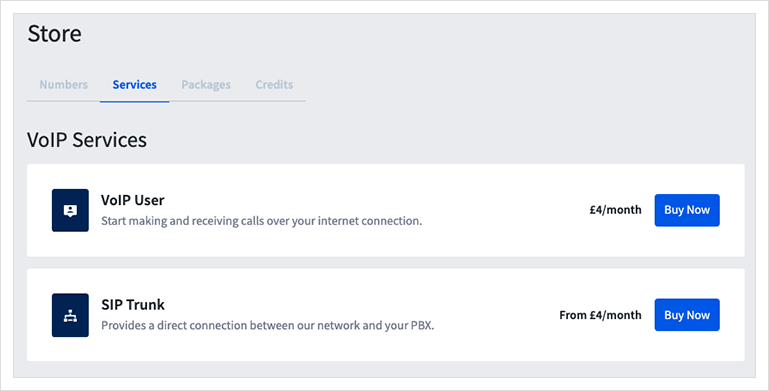
Select 'VoIP User Bolt On' from the list
- Select the number you'd like to add the VoIP User along with the quantity you require.
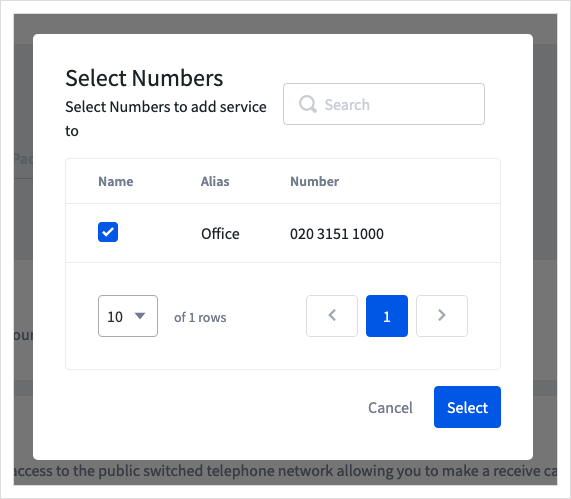
Select the number you're looking to use with the VoIP User
- Follow the steps to proceed to the basket and place the order. You will now be able to create your VoIP User configuration.
Configuring a VoIP User
You can create the configuration details for your VoIP Users in myTTNC. The details provided will be used to log in to the application or device you will be using.
Just follow these simple steps:
-
Log into myTTNC by going to www.myttnc.co.uk
-
Select
VoIP Servicesfrom the left-hand menu.
- Clicking on the arrow to the right will show all VoIP Users associated with the TTNC number. If you have more than one TTNC Number with VoIP Users, press the arrow next to the one you wish to use.

- Click
Configure VoIP User

-
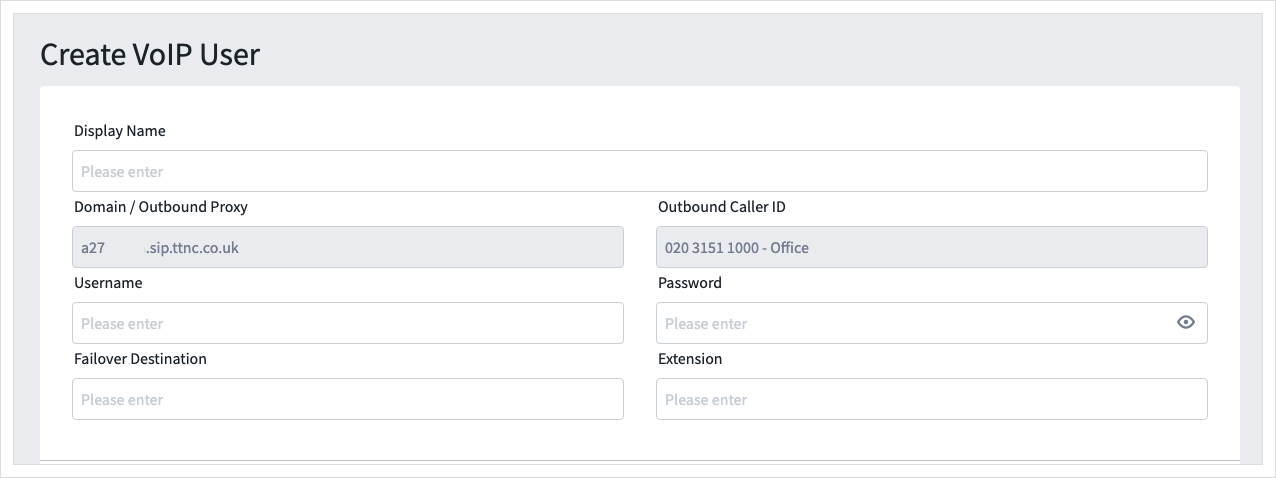
Give the VoIP User a Display Name (this will be displayed on internal calls and within myTTNC).
-
Add a 'Username', this must only contain letters and numbers, and a 'Password', which must contain an uppercase letter, a lowercase letter, a number and a special character.
-
Enter a Failover Destination - The failover destination is a landline or mobile number that will be attempted in the event that you do not have an internet/data connection. Please note we will not attempt the failover destination if you have "battery saver mode" enabled.
Give the VoIP User a nickname
-
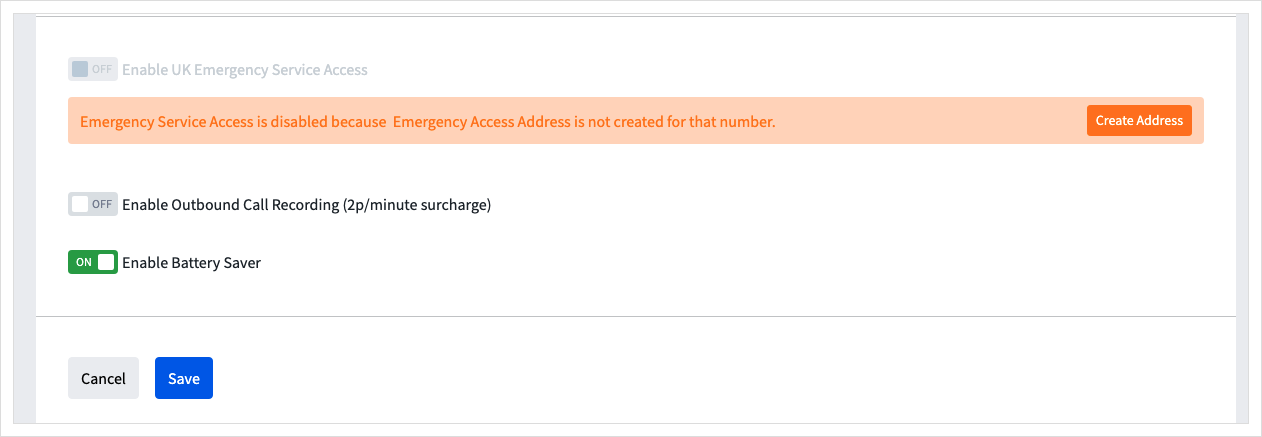
Tick the 'Enable UK Emergency Services Access' box if you wish to be able to dial the UK Emergency Services, you will need to supply a location address once the
Update detailsbutton is pressed. See more about Emergency Access here. -
Tick the "Enable Outbound Call Recording" box if you wish all outbound calls from this VoIP User to be recorded. These recordings will be stored in your Call Logs for 31 days, during that time they can be replayed or downloaded.
Please note, all recorded calls will have a surcharge of £0.02/min (2p).
- By default, the 'TTNC Softphone battery saver mode' is enabled. This will allow you to close the TTNC app on your mobile and still receive push notifications of an incoming call. If the option is disabled you must have the app open or running in the background in order to receive calls.
- Click
Saveand your VoIP User configuration details will be ready to use.

Click 'Add VoIP User'
Editing a VoIP User
You can edit VoIP Users through myTTNC. Just follow these simple steps:
-
Log into myTTNC by going to www.myttnc.co.uk
-
Select
VoIP Servicesfrom the left-hand menu.

- Clicking on the arrow to the right will show all VoIP Users associated with the TTNC number. If you have more than one TTNC Number with VoIP Users, press the arrow next to the one you wish to use.

- Click on the three dots and then click
Edit

-
Press the
Editbutton on the VoIP user. -
Edit the configuration details required, then click
Save
Deleting a VoIP User
You can delete VoIP Users through myTTNC. Just follow these simple steps:
-
Log into myTTNC by going to www.myttnc.co.uk
-
Select
VoIP Servicesfrom the left-hand menu.

- Clicking on the arrow to the right will show all VoIP Users associated with the TTNC number. If you have more than one TTNC Number with VoIP Users, press the arrow next to the one you wish to use.

- Click on the three dots and then click
Delete

Forwarding numbers to a VoIP User
You can forward numbers to your VoIP User through myTTNC. Just follow our guide to Forwarding to a VoIP User.
To answer calls via your VoIP User, you will need to register the details on a device. This can be an application on your mobile or desktop, or on a physical IP handset. For more information, see our guides to our Mobile VoIP App, Desktop VoIP App or our VoIP Hardware.
Important information about your VoIP service
Refer to the settings below if you're looking to set up your VoIP User on an IP phone or PBX.
Port | 5060 |
Transport | UDP |
DTMF Mode | rfc2833 |
Codec | G711a (PCMA) |
Server Expires | 60 secs |
RPort | Enabled |
Updated about 1 year ago
