Snom IP Desk Phones
How to configure and alter the setup of Snom IP Desk Phones
Logging into the web interface on a browser
- Press the settings button
- Go to Information then System Info to see the IP Address of the phone
- Enter the IP Address into a browser on a computer on the same network as the phone
- You will be required to create a username and password
Registering a VoIP User
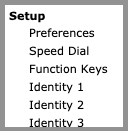
Click on Setup and then select the account you're registering - for example, 'Identity 1'.

Select your account.
You'll need to fill out the following VoIP User details which can all be found in myTTNC
Display Name: Display Name
Account: Username
Password: Password
Registrar: DomainUnder Identity 1 → RTP set the following:
"RTP Encryption" to 'off'
Preventing "Ghost" Calls
Occasionally, if a phone isn't behind a firewall, potential hackers will try to access public phone systems by scanning IP addresses for a response. These scans cause IP Desk Phones to ring and calls would show a string of digits such as 100, 1000, 10000. These are referred to as "Ghost Calls".
To prevent these calls we recommend using a firewall, however, you're able to prevent these directly on the phone by setting the following.
Under QoS/Security → Security, set the following:
"Filter packets from Registrar" to 'Yes'
Configuring a BLF (Busy Lamp Field)
BLFs have many great uses such as monitoring the status of an extension, transferring calls and using 'Call Grab'.
To get them configured, set the following.
Under Function Keys - 'Page 1'"Context" to 'Active'
"Type" to 'Transfer to'
"Number" to the extension number e.g. 1000
"Short text" to the extension name
"XML Label" P2-6 correspond to the memory keys on the phone, P1 being the top button
Changing Codecs
Our preferred codec to be used is PCMA.
Under Identity x → RTP set the following:
"Codec" to 'pcma'
Network Transport Protocol
UDP is our preferred Transport Protocol as it's usually faster, simpler, and more efficient than TCP, however, in some scenarios, TCP may be the better Transport to use. This can be changed by updating the following:
Under Identity x → RTP"Media Transport Offer" to 'UDP' or 'TCP'
Configuring Call Waiting
TTNC VoIP Users have 2 channels which can be used for inbound and outbound calls.
When you're on a call, you're able to see a second inbound call to the phone by enabling Call Waiting. Alternatively, if you don't want to be able to see that second call, you're able to disable this setting.
On the handset, press Settings → Call Features → Incoming Calls → Call Waiting
"Call Waiting" - 'on' or 'off'
Configuring Call Transfers
You're able to transfer calls to other VoIP User extensions or telephone numbers.
There are a couple of different methods:
Attended Transfer - allows you to speak with the destination you're transferring to before connecting them.
Blind Transfer - transfers the call away instantly.
To enable Call Transfers, set the following:
Under Advanced → Behavior"Quick Transfer to Speed Dial/Extension" to 'Attended Transfer' or 'Blind Transfer'
Updating Firmware
Snom occasionally makes updates to the firmware for their phones. The latest versions and update notes can be found here: http://wiki.snom.com/Firmware/
Once you've downloaded the version of firmware you'd like to update to, do the following.
Under Setup → Software Update paste in a valid URL and click 'Load'
Configuration Backup
You're able to back up the phone's configuration by exporting the config.
Under Status → Settings
At the top of the page you will see the following:
"Click 'here' to save the settings"
Click the 'here' link to download a backup of the phone's configuration.
Updated about 1 year ago
