Forwarding to a VoIP User
Instead of forwarding calls from your TTNC number to a traditional landline or mobile, you can answer the call over the internet with a VoIP User. The VoIP User can be registered onto a physical handset or the TTNC Softphone App for Mobile and Desktop.
To use this functionality, you will need to purchase a VoIP User - For more information, see our step-by-step guide to Adding a VoIP User.
Forwarding to a Single VoIP User
Just follow these steps on myTTNC to forward your calls to a single VoIP User:
- Log into myTTNC by going to www.myttnc.co.uk
- Click on
Phone Numbersin the left-hand menu.
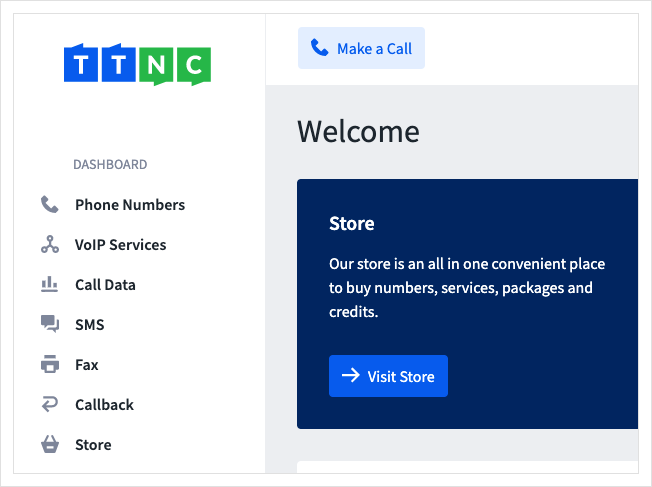
- Click on the three dots to the right of the number, and select
Edit Forwarding
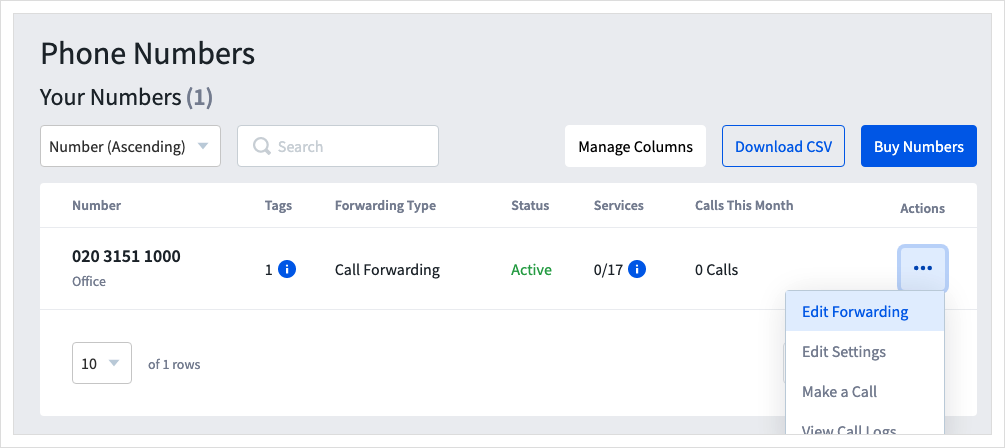
-
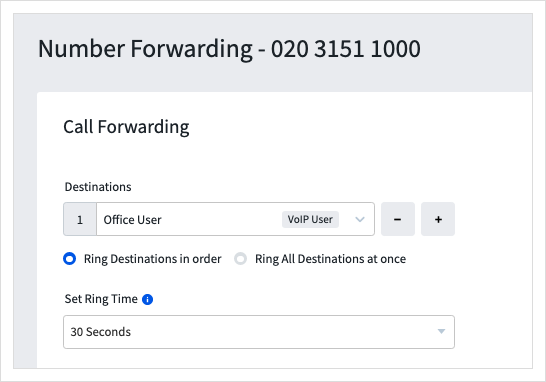
Select the VoIP User you wish to forward to from the Destinations drop-down list. The list can show a maximum of 10 rows - if the VoIP User doesn't appear, begin to type the username, and it will appear.
-
You can also change the time it takes before the next destination rings or Voicemail is activated. 20 seconds is the default value but can be changed by selecting a value from the drop-down. If there is only one forwarding destination and VM is disabled, the Ring Time is not used, and your destination will ring until answered or your caller hangs up.
- To save the settings, click
Apply

All calls to the TTNC number will now be forwarded to this VoIP User.
Forwarding to Multiple VoIP Users
While this guide will show you how to forward to more than one VoIP User, you can mix your destinations. For example, you can forward a single number to a VoIP User, a Mobile and a Landline. Each destination will have it's own call forwarding rate, which will be applies when the call is accepted.
Hunt Group vs Hunt Group ProIf you have the standard Hunt Group, you can forward calls to up to three destinations.
The Hunt Group Pro Bolt On allows up to ten destinations.
Just follow these steps on myTTNC to get all your destinations ringing in sequence:
- Log into myTTNC by going to www.myttnc.co.uk
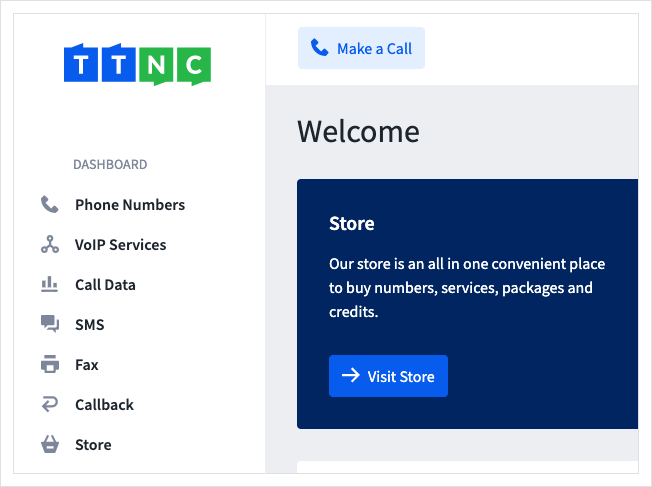
- Click on
Phone Numbersin the left-hand menu.
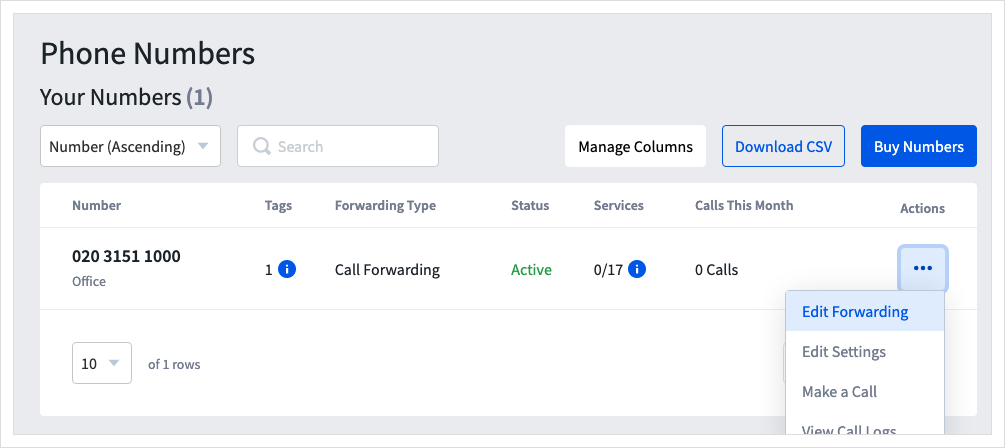
- Click on the three dots to the right of the number, and select
Edit Forwarding
-
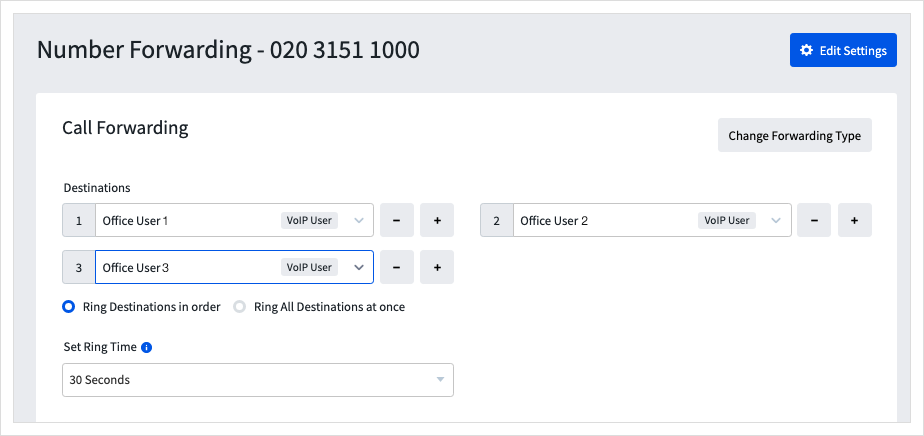
Select the VoIP User you wish to forward to from the Destinations drop-down list. The list can show a maximum of 10 rows - if the VoIP User doesn't appear, begin to type the username, and it will appear.
-
Click
+and enter the second destination, and repeat for every destination you need calls to forward to. -
If you have the Forward to All Bolt On, you can select the option 'Ring All Destinations At Once'. If you do not have the Bolt On, 'Ring Destinations in order' will automatically be selected.
-
You can also change the time it takes before the next destination rings or Voicemail is activated. 20 seconds is the default value, but can be changed by selecting a value from the drop-down.
- To save the settings, click
Apply

Updated about 1 year ago
