Webhooks
Webhooks are automated messages sent from apps when something happens. For example, you receive a call.
Webhooks from TTNC come in the form of HTTP POST requests with the HTTP request body consisting of a JSON string containing the relevant information for the webhook event. Which webhook you are receiving will depend on the schema of the JSON. At the bottom of this page, you will find a reference to all webhooks and their particular schemas and information regarding how to set up webhooks in myTTNC.
Webhooks
To set up a webhook, you will first need to create an 'Application' in myTTNC. An Application is used to access the TTNC API allowing changes to be made to your account and numbers, as well as to pull data from your account. Applications can also be used for webhooks.
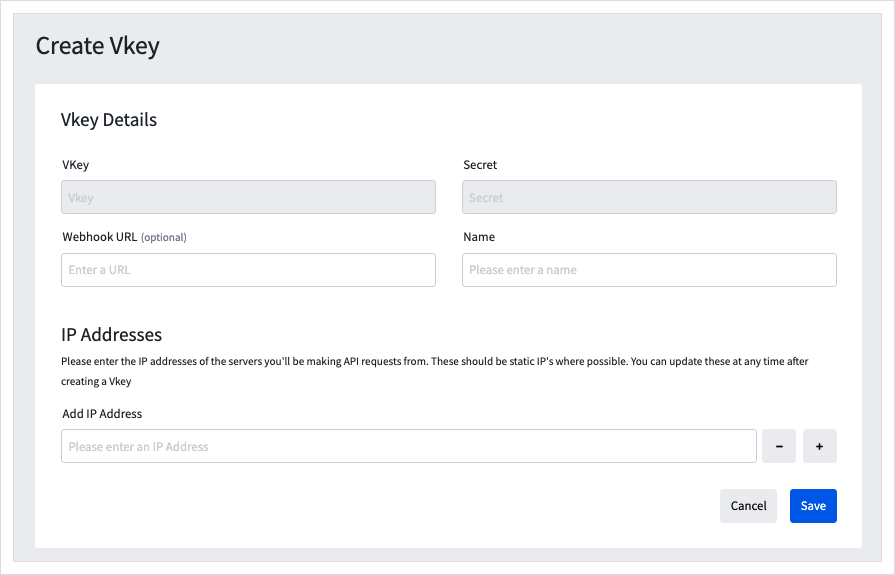
When creating an Application, you must add a Description, which is simply a friendly name for your reference. You will also need to enter IP addresses which are used to verify access to the TTNC API. At least one IP address is required to create an Application in myTTNC.
You will need to add a URL into the 'Webhook URL' field to receive webhooks, this should be a URL to your system where you are expecting to receive the webhook and its information.
To create an Application follow these simple steps:
- Log into myTTNC by going to www.myttnc.co.uk.
- Click on the Account menu drop-down in the top right corner of the page.
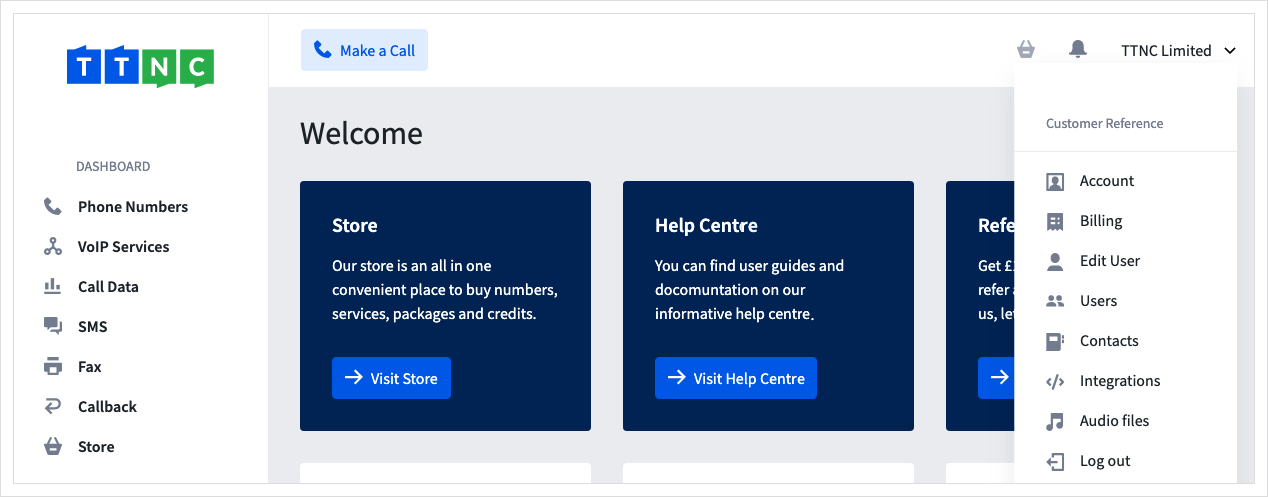
- Click on
Integrationsfrom the menu.
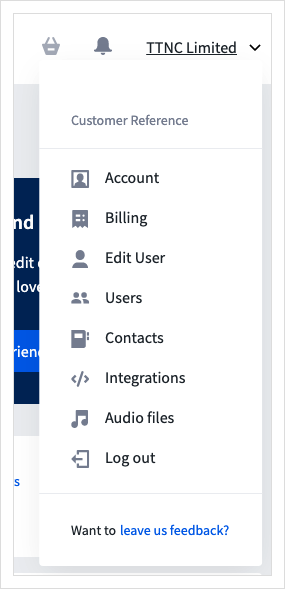
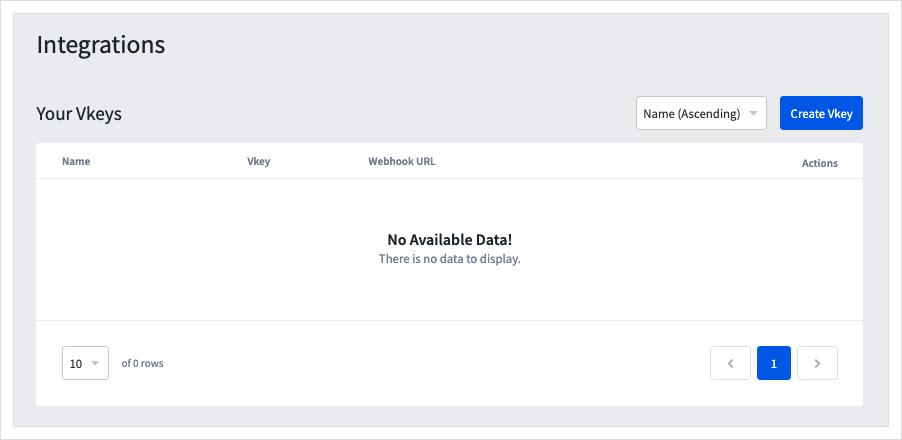
- Click
Create VKey
- Enter the Webhook URL and a Name, if you have the IP Address this can be entered, if not, this can be added at a later date.
- Click
Saveand the new Application will be added to the list.
Enable specific webhooks
Once you have created your Application including your webhook URL, you will need to set up each webhook you want to use for each applicable service. This can be done by:
- Log into myTTNC by going to www.myttnc.co.uk
- Click on
Phone Numbersin the left-hand menu.
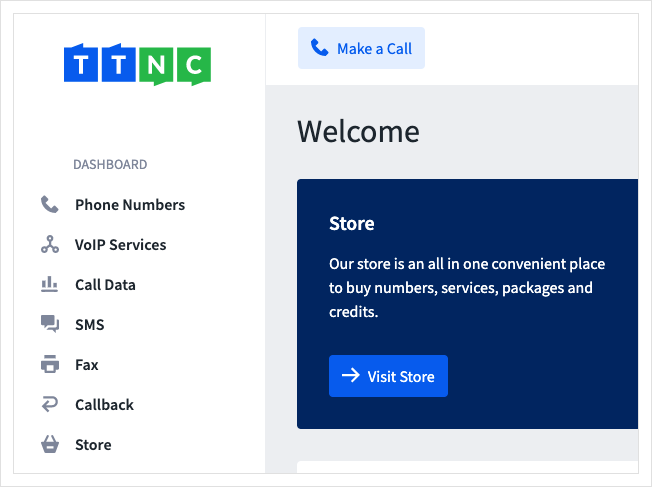
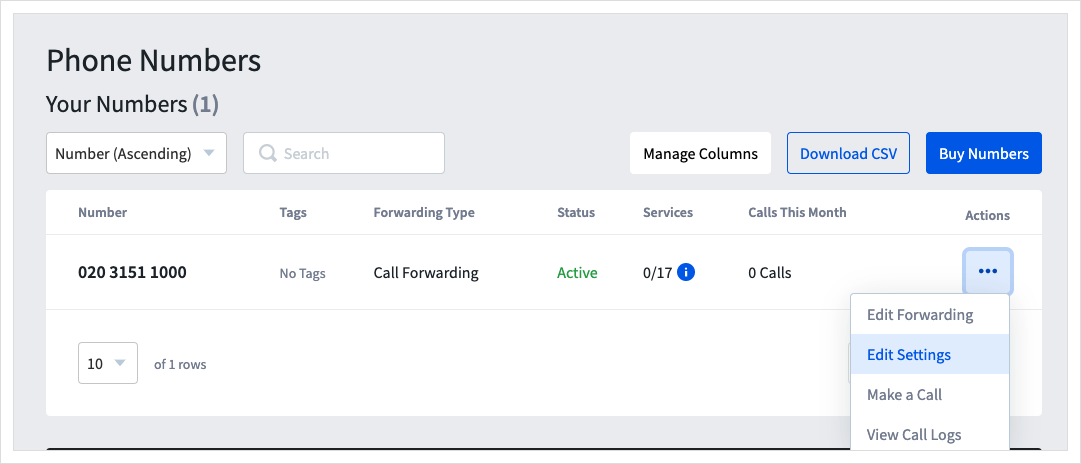
- Click on the three dots next to the number you wish to edit, then click on
Edit Settings.
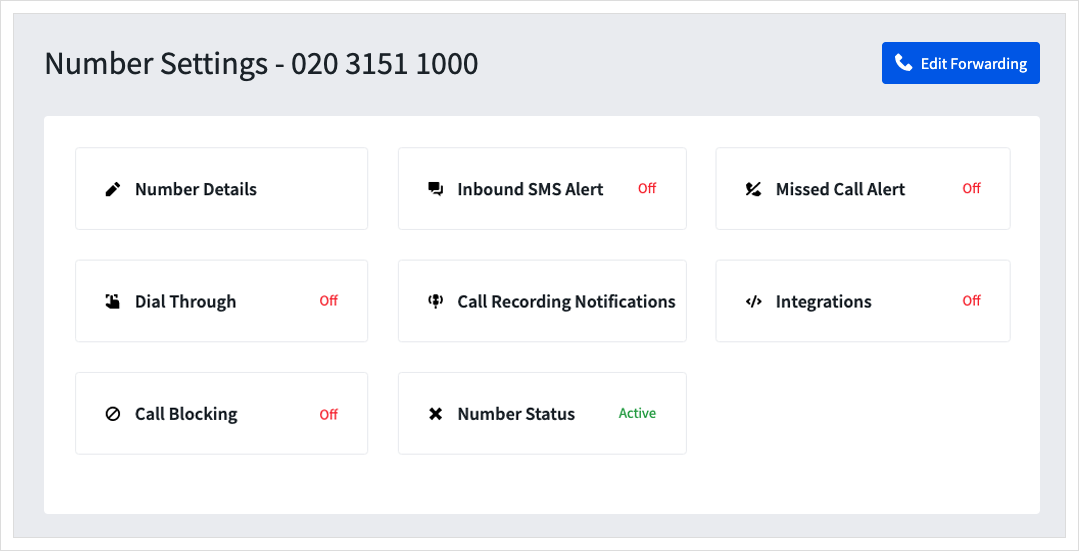
- Click
Integrations
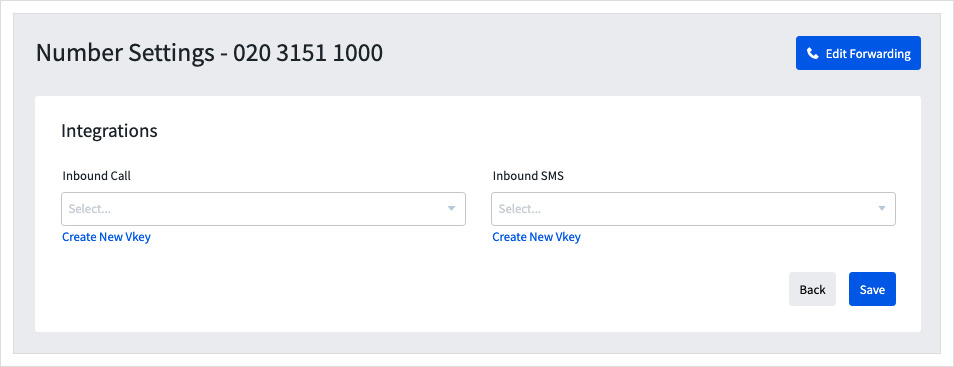
- Select the name of the 'Application' to be used for the webhook event, and click
Saveto apply these settings.
Alternatively, click Create New Vkey to setup a new Application, follow the steps at the Top of this guide
Please note:You can configure webhooks on specific parts of your telephone number setup. For example, if you have Virtual Receptionist, you can set up webhooks for each option individually by navigating to those options settings.
Once the confirmation box appears, the webhook is ready and will start to be sent to your webhook URL as soon as applicable events happen to your telephone number.
Authenticate webhooks from myTTNC
We've also built authentication into our webhooks, in the form of a signed signature sent in the HTTP header, this mean that the source and payload are verified. While not required, it would be good practice to verify the signature before accepting the webhook. The header in question will look like the following;
Webhook-Signature : 098f6bcd4621d373cade4e832627b4f6098f6bcd4621d373cade4e832627b4f6We sign the body of the POST request with an HMAC SHA256 hex digest, using the Secret Key for the Application held in myTTNC.
The Secret Key can be found in a few simple steps:
- Log into myTTNC by going to www.myttnc.co.uk.
- Click on the Account menu drop-down in the top right corner of the page.

- Click on
Integrationsfrom the menu.

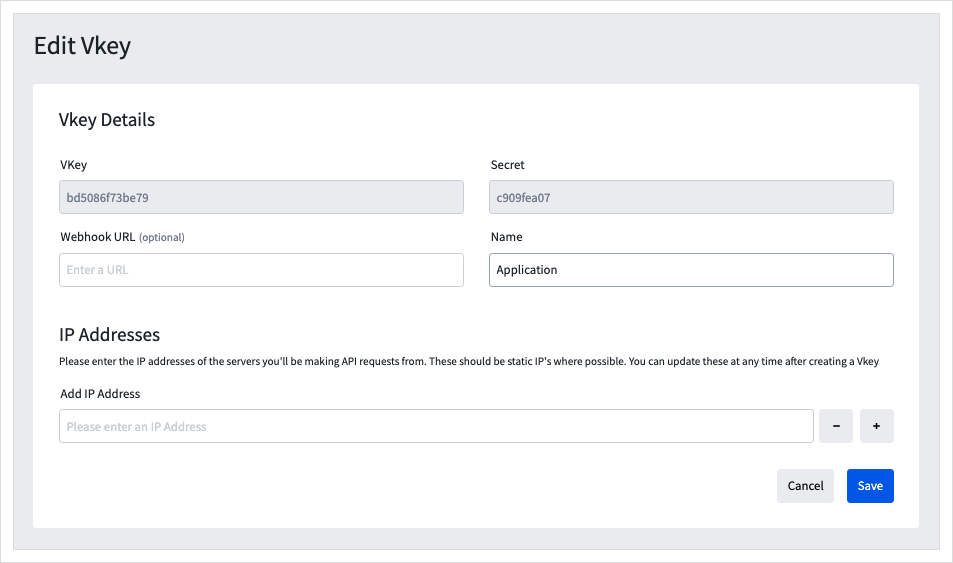
- Click on the three dots next to the row you wish to view the Secret Key of, then click
Edit.
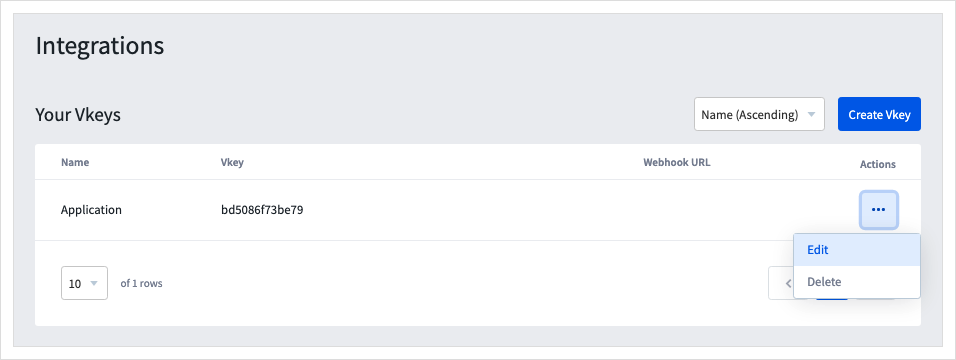
- The Secret Key is displayed in the top right field.
Webhooks for Inbound Calls
Webhooks can be triggered whenever someone makes a call to your virtual telephone number or if you have set it when they select a Virtual Receptionist menu option. This can be done by:
- Log into myTTNC by going to www.myttnc.co.uk
- Click on
Phone Numbersin the left-hand menu.

- Click on the three dots next to the number you wish to edit, then click on
Edit Settings.

- Click
Integrations
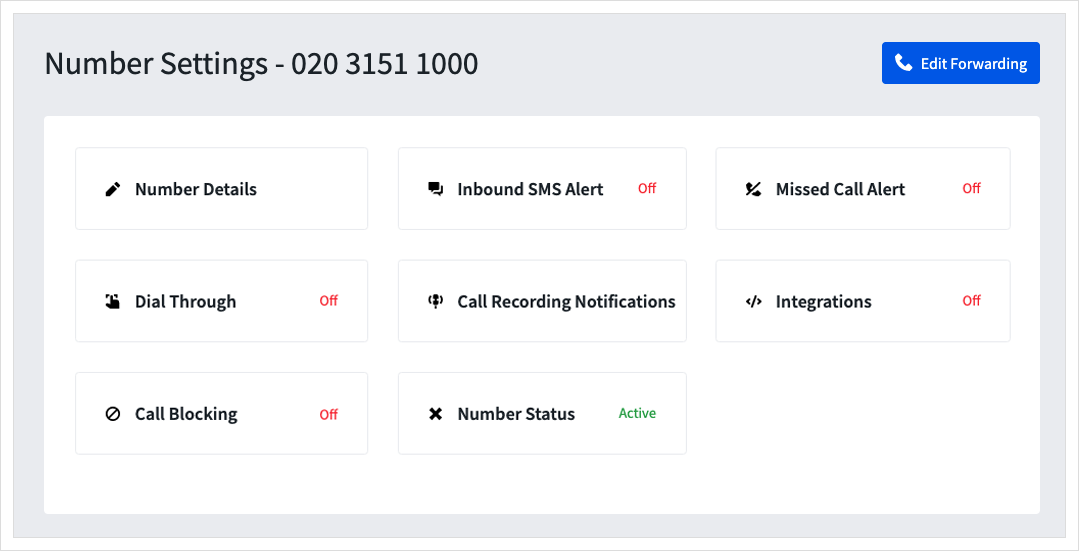
- Select the name of the 'Application' to be used for Inbound Call from the left-hand drop-down list. Click
Saveto apply these settings.
Alternatively, click Create New Vkey to set up a new Application, follow the steps at the Top of this guide

You're now ready to receive webhooks. The following information outlines how the data will be sent to you and details about what each field means in relation to the event.
JSON Payload (start of call & call progress)
When this webhook is enabled, you will receive a JSON payload whenever a caller dials the TTNC Number in question. You will also receive a JSON payload whenever the caller moves through any option based menus if you have set up the webhook on these menu options.
{
   "event" : {
       "anumber" : "01245012345",
       "anumber_contact_name": "Office",
       "bnumber" : "02031511000",
       "bnumber_tags" : [],
       "bnumber_alias" : "Main Line",
       "call_date" : "2016-05-24",
       "call_time" : "11:14:39",
       "option" : "-",
       "ref" : "!5442B5AD54E14",
       "event_type" : "incoming_call"
   }
}
string anumber | The callers CLI (telephone number). |
string anumber_contact_name | This is the Contact Name assigned to the Telephone Number (CLI) and Destination entry which is manually entered or assigned from an Inbound Call. If you don’t have a Contact assigned to the Inbound CLI, this field defaults to “-”. |
string bnumber | The TTNC number that's being called. |
array bnumber_tags | This will contain all TAGS associated with the TTNC Number and will show in this format [ “tag1" , “tag2” ]. If you don’t have any TAGS set up, this field defaults to [ ]. |
string bnumber_alias | This is the Alias or Nickname of the TTNC Number. If you don’t have a Number Alias or Nickname set up, this field defaults to “-”. |
string call_date | The date of the start of the call. |
string call_time | The time of the start of the call. |
string ref | The CDR Ref for the call - this can be used after the call has finished identifying the call. CDRs can be pulled using the TTNC API by using NoveroCDR requests. |
string option | If you have Virtual Receptionist (menu option based forwarding) enabled on your number, then this is the position in the call flow. Webhooks need to be set up on each option to be triggered. Virtual Receptionist examples:
If you have no Virtual Receptionist set up, this field defaults to "-". |
string event_type | The type of webhook. |
JSON Payload (call roundup)
When this webhook is enabled, you will receive a JSON payload whenever a call finishes. This will contain all of the information for the call, including the duration of the call, call cost and several other pieces of information explained below;
{
   "event": {
       "ref": "!8D3B9C8356C04",
       "call_date": "2016-05-24",
       "call_time": "11:14:39",
       "anumber" : "01245012345",
       "anumber_contact_name": "Office",
       "anumber_type": "UK Chelmsford",
       "bnumber" : "02031511000",
       "bnumber_tags" : [],
       "bnumber_alias" : "Main Line",
       "bnumber_type": "UK London",
       "dialled": "447777777777",
       "dialled_type": "UK Mobile",
       "duration": "45",
       "duration_system": "45",
       "cost": 0.075,
       "reason": "1",
       "reason_q805": "16",
       "event_type": "cdr"
   }
}
string ref | The CDR Ref for the call - this can be used after the call has finished identifying the call. CDRs can be pulled using the TTNC API by using NoveroCDR requests. |
string call_date | The date of the start of the call. |
string call_time | The time of the start of the call. |
string anumber | The telephone number of the caller. |
string anumber_type | The location or network of the caller. |
string anumber_contact_name | This is the Contact Name assigned to the Telephone Number (CLI) and Address Book entry which are manually entered or assigned from an Inbound Call. If you don’t have a Contact assigned to the Inbound CLI, this field defaults to “-”. |
string bnumber | The TTNC number that's being called. |
string bnumber_type | The location or type of TTNC number being called. |
array bnumber_tags | This will contain all TAGS associated with the TTNC Number and will show in this format [ “tag1" , “tag2” ]. If you don’t have any TAGS set up, this field defaults to [ ]. |
string bnumber_alias | This is the Alias or Nickname of the TTNC Number. If you don’t have a Number Alias or Nickname set up, this field defaults to “-”. |
string dialled | The telephone number of the forwarding destination which answered the call. |
string dialled_type | The location or network of the forwarding destination which answered the call. |
string duration | The duration of the call which was connected to the forwarding destination. |
string duration_system | The duration of the call which was connected to TTNC services (Virtual Receptionist, Call Greeting, etc). |
float cost | The amount of call credit deducted from your account to pay for the call (ex VAT). |
string reason | The clearing code for the call. Reason 1 means a completed call. Please see below for a full list of reasons. |
string reason_q805 | Additional clearing code for the call. Reason 1 means a completed call. Please see below for a full list of reasons. |
string event_type | The type of webhook. |
CDR Reasons
The reason numerical value can be interpreted as follows.
0 | Termination unknown |
1 | Call completed successfully |
6 | Termination during dial code resolution |
7 | Termination during number entry |
8 | Carrier not accepting call |
12 | Caller Hung Up in Voice Response |
1000 | Unspecified reason for end of call |
1001 | Number busy |
1002 | No answer |
1003 | Number unobtainable |
1004 | Number changed |
1005 | Out of order |
1006 | Incoming calls barred |
1007 | Call rejected |
1008 | Call failed |
1009 | Channel busy |
1010 | No channels |
1011 | Congestion |
1012 | Unexpected |
1015 | Caller aborted call or hung up when ringing |
1016 | Destination restricted |
1017 | Channel limit reached |
1018 | Destination is blacklisted |
1019 | Caller hung up in queue |
Webhooks for Inbound SMS messages
Webhooks can be triggered whenever an SMS is received. This can be done by:
- Log into myTTNC by going to www.myttnc.co.uk
- Click on
Phone Numbersin the left-hand menu.

- Click on the three dots next to the number you wish to edit, then click on
Edit Settings.

- Click
Integrations
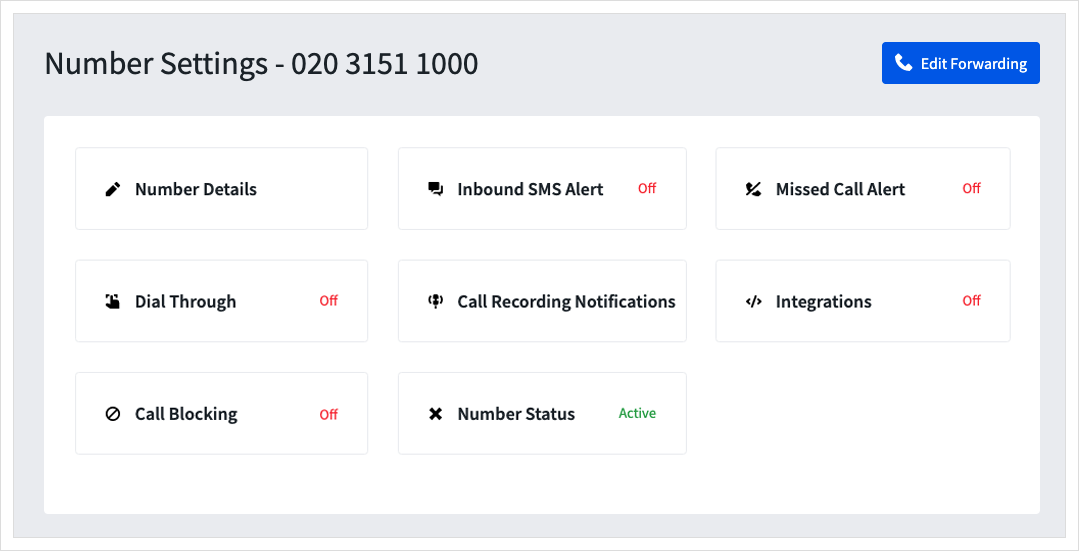
- Select the name of the 'Application' to be used for Inbound SMS from the right-hand drop-down list. Click
Saveto apply these settings.
Alternatively, click Create New Vkey to set up a new Application, follow the steps at the Top of this guide

As soon as you've confirmed the webhook settings, we'll start sending webhook notifications to you webhook URL whenever an SMS is received to your number. The following information outlines how the data will be sent to you, and details about what each field means in relation to the event.
{
    "event": {
        "event_type" : "incoming_sms",
        "originator" : "44777777777",
        "bnumber" : "02031511000",
        "sms_date" : "2016-05-24",
        "sms_time" : "11:29:48",
        "message_id" : 363723,
        "message" : "This is a test message",
        "udh" : "0500035D0302"
    }
}
string event_type | The type of webhook. |
string originator | The telephone number of the sender. |
string bnumber | The TTNC telephone number the SMS was sent to. |
string sms_date | The date that SMS was sent. |
string sms_time | The time that SMS was sent. |
int message_id | The unique identifier for the SMS. |
string message | The content of the SMS. |
string udh | "User Data Header" is binary structure which determines extra information about the SMS message. This is usually present when the SMS is part of a larger message which was over the 160 character limit for a single SMS. The UDH information will allow you to be able to rejoin the SMSs into the larger message if you desired. To determine which SMSs are related to each other in this way you must look at the last 6 characters of the UDH. For the example; "0500035D0302" you take the last 6 characters "5D0302" and split these into the pairs "5D", "03" "02".
We can infer that there is a "0500035D0201" for the first part of the message, and a "0500035D0203" for the last part of the message. |
Set up or remove Webhook Applications for a number
SetApplication
Description
This allows you to set up, change or remove which myTTNC Application is being used for particular webhooks on a number.
string Number | The TTNC number which is to be modified. |
int call_api_vkey_id | The ID of the application (obtained from NoveroVKeys::ListApplications) to be used for the webhook. To disassociate any application from the webhook set this parameter to -1. The Application for the set ID must have a Webhook URL associated with it. The 'call_api_vkey_id' webhook relates to Webhooks for inbound calls. |
int sms_api_vkey_id | The ID of the application (obtained from NoveroVKeys::ListApplications) to be used for the webhook. To disassociate any application from the webhook set this parameter to -1. The Application for the set ID must have a Webhook URL associated with it. The 'sms_api_vkey_id' webhook relates to Webhooks for inbound SMS. |
To get a successful response, at least one of the optional parameters must be sent. It is possible to send several of the optional parameters together in one request, as shown in the examples below.
<?xml version="1.0"?>
<NoveroRequest>
    <Request target="NoveroNumbers" name="SetApplication" id="TestRequest">
        <Number>01245123456</Number>
        <call_api_vkey_id>999</call_api_vkey_id>
        <sms_api_vkey_id>999</sms_api_vkey_id>
    </Request>
</NoveroRequest>
<?php
require_once('TTNCApi.php');
$Api = new TTNCApi('<username>', '<password>', '<VKey>');
$Request = $Api->NewRequest('NoveroNumbers', 'AddTag', 'TestRequest');
$Request->SetData('Number', '01245123456');
$Request->SetData('call_api_vkey_id', 999);
$Request->SetData('sms_api_vkey_id', 999);
$Api->MakeRequests();
$Response = $Api->GetResponseFromId('TestRequest');
?>require TTNCApi
api = TTNCApi.new('<username>', '<password>', '<vkey>')
request = api.newrequest('NoveroNumbers', 'SetApplication', 'TestRequest')
request.setdata('Number', '01245123456')
request.setdata('call_api_vkey_id', 999)
request.setdata('sms_api_vkey_id', 999)
api.makerequest()
p request.getresponse()api = TTNCApi('<username>', '<password>', '<vkey>')
request = api.newrequest('NoveroNumbers', 'SetApplication', 'TestRequest')
request.setdata('Number', '01245123456')
request.setdata('call_api_vkey_id', 999)
request.setdata('sms_api_vkey_id', 999)
api.makerequest()
p request.getresponse()using System;
using TTNCApi;
class Program
{
static void Main(string[] args)
{
TTNCApi api = new TTNCApi("<username>", "<password>", "<vkey>");
TTNCRequest request = api.NewRequest("NoveroNumbers", "SetApplication", "TestRequest");
request.setData("Number", "01245123456");
request.setData("call_api_vkey_id", 999);
request.setData("sms_api_vkey_id", 999);
api.MakeRequests();
TTNCParser dic = request.GetResponse();
}
}Response
<?xml version="1.0"?>
<NoveroResponse>
    <Response target="NoveroNumbers" name="SetApplication" Code="200" RequestId="TestRequest">
        <ResponseMessage>Application set successfully</ResponseMessage>
        <Success>Application set successfully</Success>
    </Response>
</NoveroResponse>
Updated about 1 year ago
